skip to main |
skip to sidebar
 This soup is filled with lesser known, or at least lesser appreciated vegetables. We throw in a few superstars just to ease you in gently, but there are some new favorites just waiting to be discovered. It's a bit like the cast of a Godfather movie - a few of the old classics, but also some new young talent that will go on to do great things. (I'll let you decide which Godfather actors you think I'm referring to. Knock yourself out.)
This soup also happens to be very inexpensive to make. And if I may put on my environmentally conscious cap for a moment, I implore you to NOT put each of these individual produce items in a plastic bag at the supermarket. You're going to peel them anyway, and you're only buying one of each thing. Just put them in your basket and then on the conveyor belt. The earth will thank you.
But you didn't come here for politics or morals, did you? You came here for soup. So here it is, in all its glory - a subtly spiced, earthy bowl of heaping goodness.
Root Vegetable Soup
adapted from Mollie Katzen's "Vegetable Heaven"
serves 4-6
INGREDIENTS:
2 teaspoons EVOO
1/2 large onion, chopped
2 small or 1 large garlic clove, minced or pressed
2 tablespoons grated fresh ginger
1/2 teaspoon salt (more to taste, if you like)
1 small rutabaga, peeled and diced
1 small turnip, peeled and diced
1 small sweet potato or yam, peeled and diced
1 medium-small potato, peeled and diced
1 small parsnip, peeled and diced
1 large carrot, peeled and diced
3 cups water
pinch of cinnamon
DIRECTIONS:
1. Heat the EVOO in a large soup pot or Dutch oven over low heat. Add onion, garlic, ginger, and salt, and sautee for about 10 minutes, until very soft. Stir in the rest of the vegetables. Cover and cook over medium heat for 10 more minutes.
2. Add the water and cinnamon, stir well. Bring to a boil, then turn the heat way down to low. Cover and simmer for 20 minutes, or until vegetables are completely tender.
3. Now you have a couple of options here: puree the soup with a stick blender (or other implement), leaving some texture. OR puree only a quarter of the soup in a blender or food processor, keeping most of the vegetables in chunks. It's totally up to you. I chose the former method.
Serve with some hot crusty bread and enjoy! I guarantee you will discover some new friends in the root vegetable kingdom.
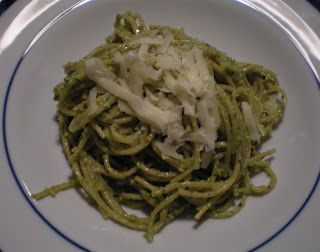 You might think I've gone a bit batty, making pesto two nights in a row. But tonight pesto plays a much more central role in the dish, and it's a completely different kind of pesto. I was going to make a recipe from my beloved Splendid Table cookbook, but ended up improvising and taking it in a whole other direction. The flavors in this pasta are far from bland, my friends. You don't really need any side dish or salad to go along with this one. It stands alone.
The directions are meant to be loosely followed. I didn't take notes while I cooked, I just sort of threw in a dash of this and a splash of that. I'll try to replicate it here. But the idea is to go heavy on the ingredients you're particularly fond of, and a bit lighter on the ones you want to just add a little undertone to the meal. So feel free to change proportions.
Pasta with Almond Pesto
serves 2-3
INGREDIENTS:
salt
1/2 pound whole wheat spaghetti
freshly ground black pepper
1 large garlic clove, peeled and roughly chopped
a generous handful of fresh chives, torn in half
a less generous handful of basil leaves
1/2 cup almonds (toasted or not; I did a combination of the two)
1 or 2 tablespoons EVOO
1/2 cup grated Gruyere cheese
DIRECTIONS:
1. Bring a large pot of water to a boil and salt it. Drop in the pasta and cook until al dente, according to package directions. Reserve 1/3 cup of the starchy cooking water before you drain the pasta.
2. While pasta is cooking, toss a pinch of salt, pepper to taste, garlic, chives, basil, and almonds into a food processor. Process just until ground and then stream in EVOO with processor running. You want a fairly chunky pesto, so don't get it completely smooth.
3. After you drain the pasta, return it to the hot pot. Add the pesto and the starchy cooking liquid, and stir vigorously until pesto is evenly distributed throughout the pasta. Add in most, but not all, of the cheese and stir. Serve sprinkled with remaining cheese.
Couldn't get much easier than that! And yet it's quite different from your average pesto pasta. Enjoy.
 I have to start off by saying the photo of this dish doesn't do it justice. I am not a professional photographer, but I think even Ansel Adams would fail to capture just how delicious this meal is. It's not that pretty, but it tastes so amazing that it will make up for it a hundred times over.
Imagine the flavor of chicken pot pie, or a rich chicken soup, combined with a subtle pesto, a hint of lemon, and delicious pillows of gnocchi. That is what we have here. I can't sing its praises enough. This dish definitely passed the husband test.
Italian Chicken and Dumplings
adapted from Rachael Ray's "Big Orange Book"
serves 2-3
INGREDIENTS:
2 tablespoons EVOO
1/2 cup fresh basil leaves
handful fresh parsley leaves
handful of pine nuts, toasted and cooled
1/3 cup freshly grated parmesan
salt and pepper
1 1/2 cups low-sodium chicken stock
3/4 pound of chicken tenders, cut into bite-sized pieces
2 1/2 tablespoons butter
1/2 cup shredded carrots
3 celery stalks, very thinly sliced
1/2 large onion, chopped
1 bay leaf
1 1/2 tablespoons flour
zest of 1/2 lemon
1 package fresh whole wheat gnocchi
DIRECTIONS:
1. Make the pesto first: In a food processor, combine basil, parsley, pine nuts, cheese, salt and pepper to taste, with 1/4 cup chicken stock. Process until smooth, and stream in 1 tablespoon EVOO while the processor is running. Set aside.
2. Heat a pot with 1/2 tablespoon EVOO over medium-high heat. Add chicken and cook until lightly browned on both sides, 3 to 4 minutes total. Transfer chicken to a plate and set aside. Add another 1/2 tablespoon EVOO and 1 tablespoon butter to the pan. When the butter melts, add carrots, celery, onion and bay leaf. Season with pepper. Cook for 5 minutes, until softened.
3. Sprinkle flour over the veggies and cook for 2 minutes. Whisk in 1 1/4 cups of chicken stock, and return chicken and any accumulated juices to the pan. Simmer until sauce has thickened and chicken is cooked through, 5 to 7 minutes.
4. While the sauce is simmering, bring a pot of water to a boil and salt it. Add gnocchi and cook until they float to the top of the pot, about 3-4 minutes. Drain.
5. While sauce is simmering and gnocchi is cooking, melt 1 1/2 tablespoons butter in a skillet. Stir in the lemon zest. When gnocchi is done, toss it in the lemon butter sauce in the skillet until golden brown on the edges.
6. Before serving, turn off the heat under the chicken and stir in the pesto. Serve chicken and sauce topped with gnocchi.
Yes, there seems to be a lot involved here, but just be methodical about it and you'll do fine. It's worth the effort, I promise. Enjoy!
 One of the cardinal rules of my kitchen is to try, really hard, to use everything up. As I'm seeking to become an experienced cook, one of the toughest lessons I've learned is that judgment about quantity is not a natural born talent. It's something you acquire. It may seem obvious - if you're feeding two people, you need two servings. But what is two servings? And will you truly eat the leftovers the next day? There are numerous variables involved in any meal, and the best intentions don't always work out.
The easiest genre to avoid waste is fruit. If you overestimated your craving for bananas, and the bananas you bought are turning black, make banana bread! Too many clementines? Time for a tall glass of fresh-squeezed juice. Strawberries getting squishy? Make a smoothie. It's logical.
Well I found myself with some apples that were no longer as crisp as my husband and I like them, so I scoured all my cookbooks for a delicious apple muffin recipe. I found a couple, but none of them would work without a trip to the grocery store, which seemed to defeat the whole purpose of using up what I already had. So I turned to our friend, the internet. And on the King Arthur Flour website (www.kingarthurflour.com; they're based out of Vermont and they make my favorite white whole wheat flour), I found a fabulous apple muffin recipe. I tweaked it a bit, and now our house smells of baking. And cinnamon. And deliciousness.
These muffins are moist and flavorful, not too intensely sweet, and make a great grab-and-go breakfast with a cup of coffee.
Apple Muffins Adapted from www.kingarthurflour.com
makes 12-18 muffins
INGREDIENTS: 2 cups white whole wheat flour
1 teaspoon baking powder
1 teaspoon baking soda
1/4 teaspoon salt
1 tablespoon cinnamon 1/2 cup (1 stick) unsalted butter, at room temperature
1/2 cup granulated sugar
1/4 cup plus 1 tablespoon dark brown sugar, packed
1 large egg 1 cup lowfat plain yogurt
2 large or 3 small apples, peeled, cored, and coarsely chopped DIRECTIONS: 1. Preheat oven to 450. Line a 12-muffin pan (see step 4) with silicups, or grease and flour each cup.
2. Whisk together the flour, baking powder, baking soda, salt and cinnamon in a bowl. Set aside.
3. In a standing mixer or large bowl, cream the butter and add granulated sugar and 1/4 cup of brown sugar. Beat until fluffy. Add the egg and mix well, scraping down the sides of the bowl once with a rubber spatula (unless you have a BeaterBlade, and then you don't need to do this!) Mix in the yogurt slowly. Stir in the dry ingredients and fold in the apple chunks.
4. Divide batter evenly among the muffin cups. You can make them really big and get 12, or if you want smaller muffins you'll need a second muffin pan. I made mine big. Sprinkle with the remaining brown sugar, and bake for 10 minutes. Then reduce heat to 400, and bake an additional 10 minutes, or until toothpick inserted in the center of a muffin comes out clean.Allow to cool a few minutes, and enjoy!
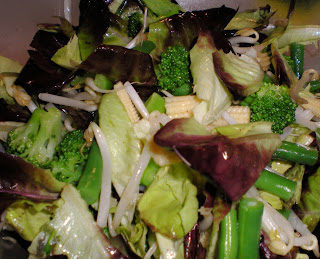 Sometimes I crave a really good salad. Not merely lettuce and cucumber, I'm talking a veggie-packed onslaught of crunchiness, full of vitamins and fiber. All it takes is picking out some good vegetables, whipping up a delicious home made salad dressing, and dinner is on the table. I found the inspiration for this one in Nigella Express, and changed up a couple of ingredients to make it a bit more budget-friendly.
This salad is great for a weeknight dinner, and if you make a large quantity you can take the leftovers for lunch the next day. The dressing is Asian-inspired, and the veggies are just plain fantastic. Feel free to add your favorite crunchy vegetables, or subtract out anything you don't like. Or if you want to make it a bit naughty, you could add some crispy won tons. Yum.
You'll notice that my "measurements" for the veggies are quite liberal. It's a salad, folks. No need for precision here.
Crunchy Salad with Spicy Asian Dressing
adapted from Nigella Lawson's "Nigella Express"
serves 3-4
INGREDIENTS:
1 1/2 tablespoons rice vinegar
1 tablespoon canola oil
1/2 teaspoon hot sauce (more if you want extra spice)
1 teaspoon sesame oil
1/2 teaspoon honey
pinch of salt
generous handful of broccoli florets cut into 1-inch pieces
a dozen or so slender green beans, trimmed and cut into 1-inch pieces two generous handfuls of salad greens OR shredded napa cabbage
generous handful of bean sprouts
one can of baby corn cobs, drained, rinsed, and roughly chopped
1 teaspoon toasted sesame seeds
DIRECTIONS:
1. Make the dressing by combining the first six ingredients in a glass jar or salad shaker and shaking vigorously.
2. Par-boil the green beans and broccoli for about 2 minutes in boiling water. Drain. Shock them in ice water to stop them from cooking too long, and to cool them off.
3. Put the greens/cabbage in the bottom of a large salad bowl. Top with bean sprouts, baby corn, broccoli and green beans. Drizzle dressing over the salad and toss. Serve garnished with toasted sesame seeds.
This is a nice light weeknight supper that will leave you satisfied and full of that I've-just-been-done-good-to feeling. Enjoy!
 This is not a new recipe for me, but I had to share it. Ever since I discovered this delicious dip, it has become my go-to when I'm asked to bring an appetizer to a party. We're going to an Oscar party tonight, so it was what I immediately thought of as my contribution.
I don't know about you, but when I go to a party I tend to graze at the appetizer table, and before I know it I've eaten more than my fair share of a bowl of some cheesy, creamy, or otherwise gluttonous dip. Dips are my weakness. And not all dips are created equal, but somehow if they're there, I'll eat them anyway. Well this one is the solution to the problem. There is absolutely nothing unhealthy in this recipe. NOTHING. I won't lie and say there are no calories in it, but if you're going to be grazing on dip all night, this is the one to do it with. It's spicy, tart, sweet and savory all at the same time. It has an incredible depth of flavor thanks to the combination of Middle Eastern flavors, and I can promise you that most parties you take it to, people will never have heard of it or eaten it before. But they'll be in love with it by the end of the night.
Muhammara (Roasted Red Pepper and Walnut Dip)
adapted from Ellie Krieger's "The Food You Crave"
Makes about 2 cups of dip
INGREDIENTS:
3/4 cup pomegranate juice OR 4 tablespoons pomegranate molasses
1/2 cup walnuts, toasted in a dry skillet until fragrant
3 tablespoons plain dry bread crumbs, preferably whole wheat
1 tablespoon fresh lemon juice
one 16-oz jar roasted red peppers, drained and rinsed
1/2 teaspoon cayenne pepper
1/4 teaspoon ground cumin
1 tablespoon EVOO
pinch of salt
DIRECTIONS:
1. If you are using pomegranate juice (such as POM wonderful) rather than pomegranate molasses, put it in a small saucepan and bring to a boil. Reduce heat to medium and simmer until reduced to about 2 tablespoons, about 6 minutes. Set aside to cool and thicken for about 15 minutes. Skip this step if you're using the molasses.
2. Put the toasted walnuts and bread crumbs in a food processor and process until finely ground. Add the reduced pomegranate juice or molasses, lemon juice, red peppers, cayenne and cumin and process until smooth. With the processor running, stream in the EVOO in a thin stream. Season with salt to taste.
Serve with pita chips, endive leaves, or your favorite dipper. It will keep in a covered container for up to three days in the refrigerator. So make this for your next party and just see how many compliments you get! Enjoy.
 I'm trying to experiment with more vegetarian entrees that are something other than pasta, soup, or salad. It's surprisingly difficult to find enticing recipes that meet those criteria. Well now I have found one, and I highly recommend it. If you like cornbread, pancakes, and Mexican food, here's a way of combining all three of those things without making yourself ill.
I highly recommend you top this recipe off with some fresh salsa, whether home made or otherwise. We didn't have any on hand, and I didn't realize the dish needed it until we were already sitting at the table to eat. The corn cakes are delicious, the black beans are tasty, and they go well together - but you need some extra moisture and spiciness. Salsa would be the perfect addition - especially a nice pico de gallo.
Spicy Corn Cakes with Black Beans
Adapted from Williams-Sonoma Food Made Fast: Vegetarian
serves 2 (with lots of beans leftover for later)
INGREDIENTS:
1 can black beans, drained and rinsed
1 teaspoon chopped fresh oregano
1 1/2 teaspoons chili powder
1/3 cup plus 1 tablespoon ground yellow cornmeal
1 tablespoon flour (I used whole wheat)
1/8 teaspoon baking soda
pinch of salt and freshly ground pepper
1 1/2 tablespoons unsalted butter, melted
1/2 cup buttermilk
1 egg
1/4 cup frozen corn kernels, thawed
canola oil cooking spray
DIRECTIONS:
1. Make the beans: Combine beans, oregano, and 1 teaspoon chili powder in a small saucepan and cook over medium heat, stirring occasionally. Cook until heated through, about 2-3 minutes. Remove from heat, cover, and set aside.
2. Mix the dry ingredients: whisk together cornmeal, flour, baking soda, 1/2 teaspoon chili powder, a pinch of salt and pepper in a bowl.
3. Mix the wet ingredients: in a separate bowl, whisk together butter, buttermilk, and egg until well combined.
4. Combine wet and dry ingredients, mixing just until blended, leaving small lumps. Fold in the corn.
5. Heat a large cast-iron pan over medium-high heat, coated in canola oil cooking spray. Add the batter, 1/4 cup at a time. You may have to work in batches, depending on the size of your skillet (if so, spray pan with oil again before each batch). Cook pancakes until they are browned and puffy, about 4 minutes, turning once. Divide among plates, top with beans (and salsa!) and serve.
This is a surprisingly hearty and satisfying meal. Save the leftover beans for a yummy dip, salad, or burrito the next day. Enjoy!
 Risotto is one of my favorite foods, both to make and to eat. Even the basic canvas that you start with is delicious, but there are endless variations. This one is only a couple of steps above the most basic risotto, and you can feel free to tweak it as you see fit. But I can vouch for the recipe as is - incredibly tangy and delicious. In fact ours was a bit *too* tangy so I've reduced the amount of lemon juice in the recipe. I took Giada's lemon risotto and turned it into a main course with the addition of a vegetable (peas) and a protein (prosciutto). It makes for a very flavorful and well-balanced, albeit admittedly carb-filled, meal.
A lot of people think risotto is hard to make. But I promise you, do it once and you'll wonder what all the fuss was about. Sure, you have to devote your undivided attention for about 20 minutes, but if you don't have the patience to do that, well, are you serious? And it's not literally undivided attention - you can step away for a moment here and there. Personally, I find it therapeutic to stand over the stove and stir, watching a meal come together like magic before my eyes. Try this one out - leave out the prosciutto if you want it to be vegetarian - and let me know if you still think risotto is too difficult for a weeknight.
You're welcome.
Lemony Risotto with Peas and Prosciutto
Adapted from Giada de Laurentiis' "Giada's Kitchen"serves 3-4
INGREDIENTS:
2 cups low-sodium chicken or veggie broth
juice of 1 medium lemon
1 1/2 tablespoons unsalted butter
1 large shallot, or 1/2 medium onion, diced
3/4 cup arborio rice
1/4 cup dry white wine
1 cup frozen peas, thawed
1/4 cup freshly grated parmesan
1 tablespoon creme fraiche or mascarpone cheese
1 tablespoon lemon zest
2 tablespoons roughly chopped prosciutto
kosher salt and freshly ground pepper to taste
1 tablespoon chopped flat-leaf parsley
DIRECTIONS:
1. In a small saucepan, bring broth and about half of the lemon juice to a simmer. Reduce heat to low and cover.
2. In a medium, heavy saucepan, melt 1 tablespoon of butter over medium heat. Add the shallot or onion and saute until tender but not brown, about 3 minutes. Add the rice and stir to coat with the butter. Add the wine and remaining lemon juice and simmer until it has almost completely evaporated, about 3 more minutes.
3. Gradually add the heated broth and lemon juice to the risotto, using a ladle or 1/2 cup measure. After each addition, stir until liquid is almost completely absorbed (if you run your spoon through the pot it should take a moment for the gap to fill back in again) before adding the next 1/2 cup of liquid. Gradually add all the broth in this manner, until the risotto is creamy and tender with a slight bite to it. Add the peas with your final addition of broth. When almost completely absorbed, turn off the heat.
4. Add parmesan, creme fraiche, lemon zest, prosciutto, and salt and pepper to taste, and stir well. Serve topped with parsley.
Enjoy!
 Beets are not exactly a sexy vegetable. Growing up, they were the root vegetable all kids loved to hate. To me they were a mysterious fluorescent bordering-on-gelatinous substance, and I couldn't decide whether to like them or not. As an adult, I've been lucky enough to have beets of various colors. I've had them roasted, raw, steamed, you name it. And I'm definitely a fan.
The trick is to have the real thing, not something out of a can or a jar. They're so easy to prepare, there's really no excuse. Plus it's fun to bring home a gnarly looking beast (because really, they are not so pretty in their natural state) and turn it into a beautiful crimson jewel to add to your salad, risotto, or any other dish. And you'll have pretty pink hands for the next 24 hours. Okay, so maybe you should wear gloves to avoid the fate I've just given myself.
I found the inspiration for this salad in the new Cooking Light Complete Cookbook, but I added and subtracted at leisure and totally changed up the dressing, so I'll go ahead and claim this as one of my own. It's not a super filling salad, so you might want to have it as an appetizer or along with something bready.
Roasted Beet Salad
serves 2
INGREDIENTS:

4 beets
4 stalks of celery, chopped
2 generous handfuls of mixed salad greens
1 tablespoon chopped fresh parsley
1/2 tablespoon honey
1 tablespoon quality balsamic vinegar
1 tablespoon EVOO
salt and pepper
DIRECTIONS:
1. Prepare the beets: Preheat oven or toaster oven to 425. Chop off the greens (reserve them and cook them later in another dish), leaving one inch of stem. Leave the root intact. Put the beets on a foil-lined baking sheet and bake for 45 minutes, or until tender. Set aside to cool. Then chop off the root and rub off the peels. Chop the beets into bite-size chunks.
2. Prepare the dressing: Put parsley, honey, balsamic, EVOO, and a pinch of salt and pepper in a glass jar or salad shaker. Shake vigorously.
3. Assemble the salad: Put beets, celery, and salad greens in a large bowl. Drizzle with the salad dressing and toss.
Go ahead and be brave; try the beets. Who knew that something that is such a pretty color could occur in nature, AND be good for you?
Enjoy!
 I work adjacent to Chinatown in downtown Los Angeles. When we go for Chinese on a workday, there is usually a group of us and we share several dishes a la carte. Inevitably, someone always wants to order orange chicken. I'll be up front with you, no holds barred: I abhor orange chicken. Okay, maybe I just wanted an excuse to use the word abhor. But I never order it myself because of some bad experiences in college involving certain inexplicably popular Chinese fast food joints. It's always greasy. It is deep fried and covered in a syrupy sauce. And I'm sorry to say that even the Chinese restaurants downtown serve something similar and call it orange chicken. Ick.
On a recent cookbook buying binge (a frequent occurrence, as you might have gathered), I picked up the Bon Appetit Fast Easy Fresh cookbook. It's a beautiful green book filled with delicious-sounding recipes. It seemed only fair to try their version of orange chicken, which sounded remarkably more palatable than the fast food version, as a sort of induction of this book into my cookbook collection.
I don't make Chinese food at home very often, other than the occasional stir fry. I was very excited to try something a bit more interesting that might satisfy us a bit more than haphazardly cooked veggies with soy sauce and sesame oil. This recipe, my friends, did the trick. It takes orange chicken to new, healthy and delicious heights. You can actually taste - gasp - REAL orange! Remarkable. Slightly sweet, slightly tangy, an all-around delicious dish. Welcome to the family, new cookbook.
Orange and Ginger Chicken
Adapted from Bon Appetit Fast Easy Fresh Cookbook
serves 2
INGREDIENTS:
2 boneless skinless chicken breast halves, or 4 breast tenderssalt and freshly ground pepper
2-3 tablespoons flour
1 tablespoon unsalted butter
1/2 tablespoon EVOO
2 teaspoons grated peeled fresh ginger
1 garlic clove, minced or pressed
1 tablespoon (packed) dark brown sugar
1/2 teaspoon dry ground mustard
1 cup fresh squeezed orange juice (Naked Juice is a nice shortcut)1 tablespoon grated orange zest
1 scallion, green parts only, thinly sliced
DIRECTIONS:
1. Season the chicken with salt and pepper and dredge in the flour; shake off the excess. Melt butter in the EVOO in a large skillet over medium-high heat, then add the chicken. Saute until just browned, 2-3 minutes each side. Remove chicken from the skillet and set aside on a plate.
2. Add ginger and garlic to the skillet and stir, cooking about 30 seconds. Add brown sugar and dried mustard and stir to blend into the sauce. Add orange juice and zest. Simmer until sauce is slightly reduced, about 6-8 minutes.
3. Return chicken and any juices to the pan. Simmer 3 minutes, then flip chicken over and add green onions. Simmer until chicken is cooked through and sauce is thick, about 3 minutes longer. Season to taste with salt and pepper if necessary. Serve. We had ours over brown rice with ever-so-slightly steamed broccoli. This meal is way better than any syrupy, greasy orange chicken you might get at certain unnameable Chinese fast food places! I'm tempted to go to the one across the street from our home and tell them about this recipe.
Enjoy!
 Everyone loves cornbread. That might be an overstatement, but I have never met someone who has tasted really good, home made cornbread and said, "Eh, I could take it or leave it." Warm from the oven, with a little bit of butter and a drizzle of honey - it's hard to beat. This particular recipe for cornbread can be made in a regular baking pan (8 x 8 if you please) but there is something magical about making it in a cast iron skillet.
I was always curious about cast iron skillets, and finally became the proud owner of two thanks to my sister and mother over the holiday season. And I am having a blast with them. They take cooking to a whole new level. Stove top? Check. Oven? Check. Both? Double check. If you don't own one yet, I'd recommend it - they're not very expensive and easy to find. (I, along with America's Test Kitchen and most people who know a thing or two about kitchen accessories, recommend the Lodge pre-seasoned cast iron skillet). And of course, the piece de resistance when it comes to cast iron skillets has to be cornbread.
Enter the master himself, one of my culinary mentors even though he doesn't know it, Mark Bittman. I can't believe this is the first recipe of his that I've posted. I read his blog daily, I worship his "How to Cook Everything Vegetarian" cookbook, and here I am posting a recipe of his from a book I picked up at the library.
It's a pretty great recipe, and you can tweak it as you see fit - add spices, add corn kernels, add cheese, add extra yogurt to make it more moist, use EVOO instead of butter - the options are endless. I'm sharing it the way I made it - delightfully crumbly, slightly sweet, and great with honey all over it and a cup of tea or coffee on the side. And as you can see from the picture above, it was a success - it's going, going, and nearly gone.
Skillet Cornbread
Adapted from Mark Bittman's "Quick and Easy Recipes from the NY Times"
Makes one 10 1/4 inch round cornbread
INGREDIENTS:
2 tablespoons unsalted butter
1 1/2 cups cornmeal
1/2 cup white whole wheat flour
1 1/2 teaspoons baking powder
1 teaspoon kosher salt
2 tablespoons sugar
1 large egg
1 1/4 cups plus 2 tablespoons plain lowfat yogurt
DIRECTIONS:
1. Preheat the oven to 375. Put the butter in a 10 1/4 inch cast-iron skillet over medium heat; heat until melted and hot, about two minutes, then turn off the heat. (The goal here is not to brown the butter, just to warm it up and melt it, so don't leave the heat on too long). You may want to tilt the skillet around to evenly distribute the butter.
2. While the butter is warming up, combine all dry ingredients in a bowl. Mix the egg and yogurt in a separate bowl, then stir the liquid mixture into the dry ingredients, combining well. If it seems too dry, add a little more yogurt.
3. Pour the batter over the preheated butter in the skillet. Give the skillet a firm shake to evenly distribute the batter. Bake for 30 minutes, until top is lightly browned and sides have pulled away from the pan. Serve warm.
Eat it however you like it - plain, with chili, with Log Cabin Chicken (TM) or any other way you choose! Enjoy.
 I wonder if you'll be able to tell as you read this that I am currently beaming with pride. You see, the whole purpose of my picking specific recipes to make every week is so that some day I'll be a great improvisational cook with dozens, no, hundreds, of techniques at my fingertips. I'll be able to make up a delicious, healthy, well-rounded meal that actually requires a bit of technique and skill, without relying upon a written recipe.
Well, exhibit A, my friends, is Log Cabin Chicken. I call it that because, well, it seems like something you'd eat in a log cabin. I'm thinking Vermont. I'm thinking snow outside. I'm thinking this paragraph makes it totally obvious that I'm a lawyer married to a film editor.
I got the idea for combining beer and maple syrup as the basis for a yummy chicken recipe from the Food Network Magazine. Apart from that, this meal is my own creation. I made some tasty skillet cornbread to complete the picture, and if you really want the recipe for that too, I'll be happy to e-mail it to you (or post it at a later date). But the cornbread is the background for this slightly sweet, rustic chicken breast and caramelized bursting-with-flavor brussels sprouts. I hope you like it.
Log Cabin Chicken with Roasted Brussels Sprouts
Serves 2
INGREDIENTS:
2 tablespoons EVOO, plus 1 tablespoon EVOO
3 sprigs fresh rosemary
4 large cloves of garlic, smashed under the flat side of a knife, skins left on
a dozen brussels sprouts, cut in half lengthwise
sea salt and fresh ground pepper
1 large chicken breast, cut in half horizontally to make two thin pieces
2 tablespoons flour
1 cup lager
3 tablespoons real maple syrup
1. Preheat the oven to 425. Place the brussels sprouts, garlic cloves and rosemary sprigs in a baking/roasting pan. Drizzle with about 2 tablespoons EVOO, and season with salt and pepper. Toss around to coat. Place in the oven and bake for about 15-20 minutes, tossing occasionally, until brussels are fork tender.
2. After the brussels sprouts have been cooking about 10 minutes, put a heavy oven-proof skillet on the stove top. Heat 1 tablespoon EVOO over medium heat. While it heats up, season the chicken breasts with salt and pepper, and dredge lightly in flour, shaking off the excess.
3. Cook chicken breasts over medium heat, about 4 minutes per side, until lightly browned. Mix together the maple syrup and beer in a separate dish. Remove skillet from heat and pour the beer/maple mixture into it, over the chicken. (Stand back, as it might cause a bit of drama in the skillet). Scrape up the browned bits to incorporate them into the sauce.
4. Reduce oven to 400. Flip the chicken over so both sides get a chance to bathe in the beer/maple mixture. Place the skillet in the oven with the still-roasting brussels sprouts. Cook about 5 minutes.
5. Serve chicken alongside brussels sprouts and roasted garlic cloves. Discard rosemary. Spoon a small amount of sauce over the chicken. (It will be quite liquidy, so don't drown the chicken in it.)
Now gobble it up, imagine you're in Vermont, and enjoy! And yes, you can eat the garlic cloves if you so desire, just pop them out of the skins first.
 Somehow lasagna means family to me. I'm not really sure why, since we didn't eat it that often when I was growing up. But a single bite just opens a doorway to a flood of some unidentifiable memory. I don't make lasagna often, but after trying this recipe, I might have to change that. It also happens to include two of my favorite go-to vegetables, spinach and roasted red peppers. Can't argue with a dynamic duo like that.
I found the basis for this recipe in one of my all-time favorite cookbooks, but I tweaked it to include some flavors that I particularly like, such as fire-roasted tomatoes, parsley, and red pepper flakes. This is a vegetarian, relatively healthy version of lasagna that I would happily have instead of a meat-filled, cheese-oozing, more traditional version (not that there's anything wrong with that, aside from artery-clogging). Don't be put off by the tofu, as you honestly can't even taste it in the finished product. It melds with the ricotta and the two become indistinguishable. Trust me.
Spinach and Red Pepper Lasagna
Adapted from Williams-Sonoma Essentials of Healthful Cooking
Serves 6
INGREDIENTS:
16 oz. package of frozen chopped spinach
8 oz. silken tofu
1 cup part-skim ricotta cheese
1 large egg white
1/4 cup finely grated parmesan
1/2 cup shredded part-skim mozzarella cheese
kosher salt and freshly ground pepper
14.5 oz. can of fire-roasted diced or crushed tomatoes
1 tablespoon chopped parsley
1/2 teaspoon red pepper flakes
6 or 7 dried lasagna noodles
2 large roasted red bell peppers, sliced into thick strips
1 large clove garlic, pressed or minced
DIRECTIONS:
1. Thaw the frozen spinach in a bowl with a couple of tablespoons of water in the microwave. When thawed, drain off excess moisture. Set aside.
2. Drain excess water off the tofu. Crumble tofu into a bowl; it will resemble cottage cheese. Add ricotta and egg white, and stir, combining thoroughly. Stir in parmesan and 1/4 cup of the mozzarella, as well as a pinch of salt and pepper to taste. Set aside.
3. Preheat oven to 350.
4. Assemble the lasagna in an 8 x 8 glass or ceramic baking dish as follows: put half the fire-roasted tomatoes in the bottom of the pan, smashing with a potato masher if necessary to break them up. Sprinkle with half the parsley and red pepper flakes. Top with two lasagna noodles, covering the majority of the sauce. Then place half the roasted red pepper strips evenly over the noodles (there will be gaps). Top with half the spinach, and sprinkle half the garlic over the spinach. Spread half the cheese mixture over the spinach evenly, using a rubber spatula or the back of a spoon.
5. Repeat with another layer of noodles, then remaining bell peppers, spinach, garlic, and then the last of the cheese mixture. Top with the remaining fire-roasted tomatoes, parsley and red pepper flakes.
6. Place baking dish on a half-sheet pan or cookie sheet (in case of spills). Bake, covered in foil, until noodles are almost soft, about 45 minutes. Remove foil, sprinkle the remaining 1/4 cup mozzarella on top of the lasagna, and bake until noodles are soft and cheese is melted, about 5 more minutes. Pop it under the broiler for a couple of minutes if you want the cheese to get bubbly and brown. Let rest for 10-15 minutes before cutting and serving.
Dish it up and enjoy!
 The idea for this salad is so obvious, and yet I'll bet it's something most of us have never actually made before. Take the famous (for good reason) BLT sandwich, and turn it into a salad. Easy. Make a delicious homemade dressing to drizzle over it. Still easy. And now you can call it lunch, dinner, midnight snack, appetizer, or Shirley. Whatever you want.
This is a great weeknight supper, as the effort involved is minimal - the only cooking is the bacon, and there is very little chopping or stirring to do. It's perfect for a Wednesday. Hence our choice to have it tonight. But if you make it on a Thursday, I'm sure it will taste just as delicious.
BLT Salad
Adapted from Stonewall Kitchen Favorites
serves 2
INGREDIENTS:
4 slices of bacon
1/2 head of Romaine or other crisp green lettuce leaves, torn into pieces
a dozen or so cherry tomatoes (preferably of multiple colors), halved
1/2 teaspoon Dijon mustard
salt and pepper
1 tablespoon chopped fresh parsley
1 scallion, thinly sliced
1 tablespoon red wine vinegar
3 tablespoons EVOO
DIRECTIONS:
1. Cook the bacon in a skillet, and place on paper towels to drain. When it is cool enough to handle, tear or crumble it into small pieces, about 1/2 inch. Set aside.
2. Make the vinaigrette by placing mustard, salt and pepper to taste, parsley, scallions, red wine vinegar, and EVOO in a glass jar or salad shaker, and shake vigorously. (Alternatively, combine in a bowl and whisk thoroughly).
3. Arrange lettuce in individual salad bowls and place tomato halves around the perimeter. Drizzle a generous amount of dressing over each salad and top with bacon pieces in the center. Serve.
And there it is, an old school favorite made slightly newer school. Enjoy!
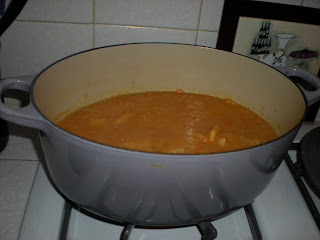
 I don't know what it is about Tuscany, but they just know how to do soup. I recently discovered this soup at a lunch spot that we visit frequently at work. Here, I am sharing with you the remarkably inexpensive, healthy, and delicious version. This soup doesn't look particularly fancy (beige, anyone?), but it's great for a cold night like tonight. And did I mention it's healthy? And delicious? And inexpensive?The ingredients are quite probably things you already have on hand. If not, the trip to the grocery store to buy them might set you back about three dollars. The soup is hearty and filling enough that you don't really need anything else with it. I had mine with toast, but the soup alone would have been just fine.
Tuscan White Bean Soup
Adapted from Giada de Laurentiis' "Giada's Kitchen"
Serves 3
INGREDIENTS: (Fresh & Easy is not a sponsor of this blog. If only.)
1 tablespoon unsalted butter
1/2 tablespoon EVOO
1 large shallot, chopped
2 sage leaves, roughly chopped
1 (15 oz.) can of cannellini beans, rinsed and drained
2 garlic cloves, peeled and roughly chopped
1 3/4 cups low-sodium chicken or veggie broth
1/4 cup skim milk
pinch salt
freshly ground black pepper
DIRECTIONS:
1. In a heavy, medium-sized pot or Dutch oven, heat the butter and EVOO over medium heat. Add the shallots and cook until soft, about 3-5 minutes.
2. Add sage, beans, and garlic, and stir. Add the broth and bring to a simmer. Cook at a gentle simmer for about 15 minutes, until garlic is tender.
3. Remove from heat, and puree soup (in batches in a food processor, or with a stick blender). Stir in milk, and season to taste with salt and pepper. Reheat gently if necessary, and serve.
Enjoy!
 This meal is restaurant-worthy. Sure, it looks relatively unassuming. But it tastes incredible. The shallot-wine sauce on the chicken is the highlight of the dish, and I'm already day-dreaming about using it again on steak in the future.
Don't be turned off by peppercorns in the title of the recipe - they aren't as prevalent as they may sound. Personally, when I hear "peppercorn-encrusted steak" or "peppercorn-encrusted salmon" I am really turned off, because that usually means all you taste are the peppercorns. But here they are delicately applied, and they really do add to the flavor of the chicken, rather than distracting from it. If you own a pepper mill, put it on the coarsest setting. If you don't, put some peppercorns in a ziploc bag and smash them with the back of a skillet. Either way will work.
I ate this meal alone while my husband is working late tonight, and it was a shame because there was no one to ooh and aah over it with. My cat had to suffice, and she didn't want to taste any herself. She just took my word for it. (Please don't judge me.)
Rosemary Peppercorn Chicken with Lemon Spinach
Adapted from Food Network Magazine
serves 2
INGREDIENTS:
2 tablespoons dijon mustard
1 large or 2 small boneless, skinless chicken breasts (about 3/4 pound)
2 teaspoons coarsely ground peppercorns
1/2 teaspoon finely minced fresh rosemary
kosher salt
1 1/2 tablespoons EVOO
1 shallot, thinly sliced
3 tablespoons good quality red wine (I used merlot)
1/4 cup low-sodium chicken broth
1 tablespoon chopped fresh parsley
1/2 pound baby spinach
1/2 teaspoon finely grated lemon zest
DIRECTIONS:
1. Preheat the oven to 350. Brush chicken breast on both sides with 1 tablespoon dijon mustard. Sprinkle both sides with rosemary, peppercorns and salt to taste, patting the herbs into the chicken so they don't fall off.
2. Heat a medium skillet over medium-high heat. Ad 1 tablespoon EVOO. Add chicken and cook until golden brown (NOT cooked through), about 6 minutes, turning only once. Transfer to a baking dish and bake until cooked through, about 12 minutes.
3. Meanwhile, add shallots to the same skillet you used in step 2. Cook over medium-high until just soft and browned. Remove pan from heat, and carefully add the wine (step back!). Return to heat and scrape up browned bits with a wooden spoon. Add the broth, bring to a boil and cook until slightly thickened, about 2 minutes. Stir in the remaining mustard and the parsley.
4. In a deep skillet over medium-high heat, heat the remaining 1/2 tablespoon EVOO. Add the garlic and cook about 30 seconds. Add spinach, season with just a tiny sprinkle of salt and cook until wilted. Stir in the lemon zest.
5. Slice the chicken breast and top with the shallot-wine sauce. Serve beside the spinach.
I hope you have someone with you to ooh and aah over this one. If not, feel free to ooh and aah to me about it! Enjoy.
 I know what you're thinking. You're thinking I left an "s" off the end of the title of this recipe. Well you're wrong. And no, there isn't only one pecan in the entire recipe. But there is a subtle background flavor of pecan running through the whole cookie batter that results in a mysterious nuttiness that you can't quite place (unless you're told what it is). The other day I felt like baking chocolate chip cookies, but I wanted them to be a little bit different somehow. I found a recipe for chocolate chip & pecan cookies in the new Williams-Sonoma cookbook, and decided to make it without the pecans, since I don't like chunks of nut in my cookies. But they are still there, ground in with the flour in a food processor, lending their yummy pecan-ness to the cookie as a whole.
I'd also like to give an honorable mention to a new purchase of mine, the beater blade. It's a new paddle attachment for my stand mixer that has built-in silicon scrapers so you don't have to keep stopping the mixer and scraping down the sides with a spatula. That's right. It's awesome in the most literal sense. And it made these cookies insanely easy to make.
The photo at the top of this entry is of the last lonely cookie. I ate it soon after the photo was taken. Let's all take a moment to mourn for the loss of the Last Cookie. And now you can bake some more.
Chocolate Chip Cookies with Pecan
Adapted from The Williams-Sonoma Cookbook
makes about 2 dozen cookies
INGREDIENTS:
1 cup of white whole wheat flour
1/3 cup coarsely chopped pecans
1/2 teaspoon baking soda
1/2 teaspoon salt
1/2 cup (1 stick) unsalted butter, at room temperature
1/3 cup firmly packed golden brown sugar
1/3 cup granulated sugar
1 large egg
1/2 teaspoon vanilla extract
1 cup semisweet chocolate chips
DIRECTIONS:
1. Preheat oven to 375. Line 2 cookie sheets with silpat liners or parchment paper.
2. In a food processor, combine flour, pecans, baking soda, and salt, and process until pecans are ground into a powder.
3. In the bowl of a standing mixer (or a regular bowl if you're using a hand mixer), beat the butter, brown sugar, and granulated sugar until light and creamy, about 3 minutes. Add the egg and beat well, then beat in the vanilla. Stir in the flour mixture until well mixed, then stir in the chocolate chips.
4. Drop the dough with a cookie scoop or ice cream scoop (or whatever utensil you prefer) onto the cookie sheets, spacing them 2 inches apart. Bake, rotating the cookie sheets about halfway through, until golden brown, about 10 minutes total. Let cool on the sheets on wire racks for 3 minutes, then transfer cookies to racks to cool completely.
Now go ahead and try not to eat half of them before they cool down. Let me know how you do.
 Break out the crusty sourdough, because I have the perfect soup to eat it with. Here's another barn-burner. It's spicy, a little creamy, and chock full of vegetables. I can definitely recommend this one.
Corn chowder is one of those soups that I know I should like in theory, since I like corn and I like chowder. But it just never inspires a whole lot of excitement. It's a bit like oatmeal. I know it's good, but why would I order it in a restaurant?
Well this soup puts regular corn chowder in the corner with a dunce cap on. Okay maybe that's a little harsh; I wouldn't want to offend any corn chowder fanatics out there. But this one is anything but boring, and I will definitely be making it again. Remind me of that the next time I have a cold, as this soup is comforting in all the best ways. You can easily make it vegetarian by leaving out the bacon.
Harvest Creamy Corn Chowder
Adapted from Everyday with Rachael Ray
serves 4
INGREDIENTS:
 1 tablespoon EVOO
2 slices of bacon, chopped
1/2 medium onion, chopped
1/2 red bell pepper, seeded and chopped
3/4 pound fingerling potatoes, sliced into small chunks
3/4 cup sweet corn kernels, fresh or frozen (about 2 to 3 ears worth)
1 small zucchini, finely chopped
3 sprigs thyme
1 bay leaf
1/2 teaspoon paprika
1 tablespoon flour
1 1/2 cups low sodium chicken or veggie broth
3/4 cup skim milk
1/4 cup heavy cream
1/3 cup chopped flat-leaf parsley
salt and pepper
1 tablespoon hot pepper sauce
DIRECTIONS:
1. In a medium soup pot or Dutch oven, heat the EVOO over medium-high heat. Add the bacon and cook until slightly crispy.
2. Add onion and bell pepper and cook until softened, about 4-5 minutes.
3. Add potatoes, corn, zucchini, thyme, bay leaf and paprika and cook an additional 4 minutes. Sprinkle the flour into the pot, stir and cook for 1 minute.
4. Gradually stir in the broth and simmer until slightly thickened. Add milk, cream and parsley, stir and simmer until potatoes are tender, about 10 minutes.
5. Season to taste with salt and pepper, and stir in hot pepper sauce. Serve.
Now if that doesn't make you feel comforted, I don't know what to tell you. Enjoy!
 Jicama is an excellent ingredient for salads, and in this one it is the main event. If you've never tasted jicama, or always avoided it at the salad bar, you don't know what you're missing. It tastes a lot like an Asian Pear, only more subtle. It's crunchy and juicy and slightly sweet. It looks so unassuming in the grocery store, like a squat potato of sorts.
This salad also features watercress, one of my recent favorites, and avocado, which needs no introduction. The dressing is slightly spicy and beautifully citrusy, so it feels very appropriate for winter. I had this as my entree, but you could make smaller servings and have it as an appetizer. Either way, it's full of underrated flavors that combine to make something fantastic. And it's unusual enough that you can feel proud of yourself for not just serving up the same-old salad.
Jicama-Watercress-Avocado Salad
Adapted from Veganomicon, by Moskowitz & Romero
serves 2 to 3
INGREDIENTS:
2 tablespoons rice wine vinegar
1/4 cup fresh orange juice
1 tablespoon lime juice
1 tablespoon EVOO or vegetable oil
1 tablespoon hot pepper sauce or chile sauce
1 tablespoon low sodium soy sauce
1 tablespoon sugar
1/2 teaspoon toasted sesame oil
1 small (or 1/2 large) jicama, peeled and grated
small bunch watercress, roots and bigger stems removed
1 ripe avocado, peeled, cut in half and sliced
1/4 cup roasted unsalted peanuts, chopped coarsely
6 mint leaves
DIRECTIONS:
1. The dressing: combine vinegar, orange juice, lime juice, EVOO, hot sauce, soy sauce, sugar, and sesame oil in a glass jar or salad shaker. Shake vigorously to combine. Let sit at room temperature for about 10 minutes so the sugar dissolves. Shake again before using.
2. Place the shredded jicama in a bowl, and pour most of the dressing over it, reserving about 4 tablespoons worth. (Use your judgment - you might not need to use up all the dressing). Mix to coat.
3. On each plate, place a bunch of the watercress, dividing evenly. Place about a cup of the jicama-dressing mixture on each pile of watercress. Sprinkle with peanuts. Place avocado slices around the perimeter of the salad, or on top. Drizzle with additional dressing, garnish with mint, and serve.
It tastes like something you might find in a trendy Los Angeles restaurant. Only you'd probably pay about three times as much as it cost to make! Enjoy.
 Growing up, Sunday Lunch was a phrase deserving of those capital letters. I suppose it was an English tradition to have the "main meal" at lunch time, particularly on Sundays. I can't say I keep up this tradition on a regular basis, but more often than not I do try to cook something nice for lunch on Sundays. Mostly because I actually have time for more than a 30-minute meal.
Today my mother-in-law came over for lunch, so I wanted to make something tasty and comforting, but with a touch of elegance. I turned to Giada for the main attraction, her Chicken Scaloppine with Saffron Cream Sauce. I made sage polenta and steamed sugar snap peas to go alongside, and a simple affogatto (ice cream with hot coffee and chocolate shavings) for dessert.
Overall it was definitely a success, and I think the chicken brought a certain amount of sophistication to an otherwise homey dish. I tweaked Giada's recipe only slightly, by pounding the chicken first to make it extra thin so it would cook quickly, and adjusting a few other minor things. But it's definitely one to put in the "keeper" pile.
It's no pot roast or whole roast chicken, but for me, it is definitely worthy of the Sunday Lunch title.
Chicken Scaloppine with Saffron Cream Sauce
Adapted from Giada de Laurentiis' "Giada's Kitchen"
Serves 4
INGREDIENTS:
2 tablespoons EVOO
1 pound of chicken breast cutlets, pounded thin between two sheets of wax paper
ground sea salt
fresh ground pepper
2 shallots, roughly chopped
1 garlic clove, minced or pressed
1/2 cup dry white wine
1 1/2 cups low sodium chicken broth
1/4 teaspoon saffron threads
1/2 cup heavy cream
3 tablespoons chopped fresh flat-leaf parsley
DIRECTIONS:
1. Warm EVOO in a large skillet over high heat. Season the chicken with salt and pepper, and add to the hot oil. Cook until golden and cooked through, about 2-3 minutes per side. Transfer to a serving plate and tent with foil to keep warm.
2. Reduce heat to medium, and add shallots and garlic to the pan. Cook until tender, about 2 minutes. Deglaze the pan with the white wine, using a wooden spoon to scrape the brown bits from the bottom of the pan. Cook until wine is almost evaporated.
3. Add chicken broth and saffron threads to the pan and bring to a simmer. Cook for 10 minutes, or until broth is reduced by half. Add cream, a pinch of salt and pepper and stir to combine. Simmer for 1 minute to blend the flavors. Pour sauce over the chicken, sprinkle with parsley and serve.
Absolutely delicious. My mother-in-law, Virginia, assured me that this is a good dish to impress a mother-in-law with, and I figure she should know!
Enjoy!


