Sunday, January 31, 2010

Red Chili

Chili is a glorious universe.  There are so many variations, and I don't begin to claim that I know what the "best" variation is, if such a thing exists.  I've made white chili before, which was delicious and not too heavy.  Today, I opted for red chili.  And while some of the ingredients are similar or even identical, it is a completely different meal.

This is a hearty, soul-warming meal.  It's meaty, it's spicy, it has a deep rustic flavor that only gets better the longer it sits.  Normally I reduce a recipe to make enough for two or three people, but for chili, I went all out and made a big pot.  I know that the leftovers will be even better than the freshly made batch. 

I understand that for some people chili is a personal thing - they have to have it a certain way, with certain adornments absolutely required.  I, however, like the idea of chili as a free-for-all.  It can be a little different every time you make it.  I took some aspects of our friend Mike's chili recipe and added it to the chili recipe in Mad Hungry, a fabulous new cookbook.  The result is magnificent.

Use whatever garnishes you like - I opted for grated cheddar, scallions and avocado.  They rounded out the meal beautifully.

Dried red chilies can be found in the produce section of your supermarket.  Get the medium-large ones - the specific variety doesn't really matter.

Red Chili
adapted from Mad Hungry
serves 6

INGREDIENTS:

5 dried red chilies (ancho, Hatch, or Anaheim)
1 tablespoon olive oil
1/2 large yellow onion, chopped
3 garlic cloves, minced or pressed
1 1/4 pounds hot Italian turkey sausage, casings removed
coarse salt
1 teaspoon ground cumin
1/4 teaspoon crushed red pepper flakes
1/2 teaspoon dried oregano
1 bay leaf
two 14.5 oz. cans no salt added diced tomatoes, with juice
12 ounce bottle of beer (ale works nicely)
one 15 oz. can pinto beans, drained and rinsed
garnishes of your choosing

DIRECTIONS:

1.  Break the stems off the dried chilies and remove the seeds.  Place the chilies in a bowl and cover with boiling water.  Let sit for five minutes to soften.  Place the chilies in a food processor with about 1/4 cup of the soaking liquid and process to a paste.  Set aside.

2.  Heat oil in a large (5 qt. works) Dutch oven or soup pot, or a very large skillet, over medium-high heat.  Add onion and garlic and saute until translucent, about 3 minutes.  Season with a pinch of salt.  Add the sausage, breaking up with a wooden spoon.  Brown the meat, stirring occasionally, for about ten minutes, until cooked.   If there is a lot of grease in the pan, spoon some of it out, but make sure you leave some for flavor.

3.  Stir in cumin and cook for 30 seconds.  Add the chili paste you made in step one, red pepper flakes, oregano, bay leaf, and another pinch of salt.  

4.  Add tomatoes and beer and bring to a simmer.  Reduce heat slightly and simmer for 30 minutes, uncovered, stirring occasionally.  Add beans and cook for an additional 20 minutes, stirring occasionally.  Season to taste, and serve.

Enjoy!

Thursday, January 28, 2010

Walnut Chicken Paillards with Arugula Sweet Potato Salad

The one question I get from my fellow attorneys more than any other when they hear about my blog is, "How do you have time?"  It makes me laugh every time, because the fact is that I would make time even if I didn't have it, since cooking brings me more joy than most things.  However, the trick is that the recipes I make really aren't that time-consuming.  Those of you who actually have tried some of them can attest to this.  I'm not making slow-roasted pork shoulder or hand-made ravioli every night. 

Take this meal for instance.  I realize this doesn't look or sound like a weeknight meal.  But I pulled it together really quickly, and without too much effort.  The walnut sauce on the chicken has only three ingredients, but tastes absolutely fantastic - nutty and delicious.  The arugula sweet potato salad is as tasty as it is beautiful.  The entire meal is rich and elegant, yet filled with healthy elements.

So go ahead, shock and awe your guests when you make this for them.  They'll marvel at how much time you must have spent in the kitchen. 

Walnut Chicken Paillards with Arugula Sweet Potato Salad
adapted from Martha Stewart's Dinner at Home
serves 2

INGREDIENTS:

for the salad

1 sweet potato, cut into 1-inch-thick rounds (unpeeled)
1 leek, white and pale green parts only, halved length wise, cut into 2-inch pieces
2 tablespoons extra virgin olive oil
salt and freshly ground pepper
1/2 teaspoon dijon mustard
1/2 tablespoon sherry vinegar
2 cups loosely packed baby arugula

for the chicken

1 1/2 tablespoons canola oil
2 chicken cutlets, pounded to 1/4 inch thickness
handful of walnut pieces
1/4 cup low sodium chicken stock
1 tablespoon sherry vinegar

DIRECTIONS:

1.  Preheat oven to 400.  Combine sweet potatoes and leeks on a rimmed baking sheet, and toss with 1 tablespoon oil, a pinch of salt and pepper.  Roast for about 20 minutes, tossing halfway through, until sweet potatoes are fork tender and leeks are golden brown.  Cool for 10 minutes.

2.  Meanwhile, whisk together mustard and vinegar, then slowly whisk in remaining tablespoons of oil.  Season with salt and pepper and toss the arugula with the dressing.  After cooling the roasted veggies, toss them with the rest of the salad.

3.  While the veggies are roasting you can start on the chicken.  Heat the canola oil in a large skillet over medium-high heat.  Pat chicken dry with paper towels and season both sides with salt and pepper.   Cook for about 3 to 4 minutes per side until browned and cooked through.  Remove to a plate and keep warm.

4.  Reduce heat to medium-low and add walnuts to the pan.  Toast, stirring constantly, until fragrant and golden, about 3 minutes.  Raise heat to medium and add the chicken stock and vinegar to the pan.  Cook, swirling the pan occasionally, until reduced by about half.

5.  Place the salad on plates, top with the chicken, and drizzle the sauce on top of that. 

Enjoy!

Wednesday, January 27, 2010

Roasted Butternut Squash Soup


The Barefoot Contessa knows soup.  She knows that the secret to a delicious and remarkably flavorful soup is to roast the vegetables first.  She's done it before, and now she's done it again.

I like butternut squash soup.  It can get a little monotonous by the time you're about halfway through the bowl, but the flavors are nice and it generally keeps me interested.  Roasted butternut squash soup, however, is a whole other ballgame.  The squash is roasted along with apples and onions, and everything gets browned and gorgeous before being pureed and then adorned with some curry flavors.  I think you're probably sold by now.

This soup is delicious.  You should try it.  Right now.

Roasted Butternut Squash Soup
adapted from Barefoot Contessa Back to Basics
serves 2

INGREDIENTS:

1 small butternut squash (1 to 1 1/4 pounds), peeled and seeded
1 small yellow onion
1 small gala apple, peeled and cored
1 tablespoon extra virgin olive oil
kosher salt and freshly ground black pepper
1 1/2 cups low sodium chicken stock
1/4 teaspoon curry powder
handful of flaked coconut, lightly toasted
handful of sliced almonds, lightly toasted

DIRECTIONS:

1.  Preheat oven to 425.

2.  Cut the squash, onion, and apple into 1 inch pieces.  Spread on a rimmed baking sheet and drizzle with olive oil, a pinch of salt and pepper.  Toss together to coat.  Roast for 30 minutes, tossing occasionally, until very tender and browned.

3.  Meanwhile, heat chicken stock to a simmer.  When the vegetables are done, put them in a food processor or blender with about 1/4 cup of the stock, as well as the curry powder, a pinch of salt and pepper, and pulse until mostly pureed, but still chunky.   Add the rest of the chicken stock and pulse a couple of times.  The texture should be that of a thick soup.

4.  Serve the soup topped with the toasted coconut and almonds.

Enjoy!

Tuesday, January 26, 2010

Cold Sesame Noodles


Sesame noodles are apparently pretty common Chinese takeout fare, but I have to say, I've never actually ordered them myself.  They're tasty and easy, and this recipe is no exception to that rule.  I made a spicy celery salad on the side, and the flavors complemented each other quite well. 

The tahini is really the most noticeable flavor in this dish, so if you're not a fan of tahini, you should probably skip this.  You can always use peanut butter instead.  I also think this dish would be great (albeit completely different) if you eliminate the tahini and increase the sesame oil a little bit.  There are all kinds of variations on this theme that you can try out. 

I used soba noodles, but the original recipe called for Chinese egg noodles.  Just about any long thin pasta will work.

Cold Sesame Noodles
adapted from Mad Hungry by Lucinda Scala Quinn
serves 2

INGREDIENTS:

1/3 pound soba noodles
1/2 teaspoon toasted sesame oil
2 tablespoons sesame paste (tahini)
1/4 cup water, plus more if needed
1/2 tablespoon rice vinegar
1 tablespoon soy sauce
1/2 teaspoon sugar
1/4 teaspoon Sriracha sauce (or other hot sauce)
1 scallion, thinly sliced
1/2 tablespoon minced fresh ginger

DIRECTIONS:

1.  Cook the noodles according to package directions, until just tender.   Drain and toss in a bowl with the sesame oil.  Refrigerate until ready to serve.

2.  Meanwhile,  in a large bowl, thin the sesame paste by stirring enough water to achieve the consistency of heavy cream.  Whisk in the vinegar, soy sauce, sugar, and Sriracha.  Stir in about 3/4 of the scallion and the ginger.

3.  Just before serving, toss the chilled noodles with the sauce.  Garnish with remaining scallion.

Enjoy!

Sunday, January 24, 2010

Tender Greens and Vegetables with Blood Orange Vinaigrette


I have a soft spot for blood oranges.  They seem like the passionate, long-lost cousin of the regular orange.  They have a depth of flavor that is quite distinctive from their more common relative, and their color is stunningly beautiful.  What's not to love?

Well they're in season right now, so it seemed the perfect time to buy a bag full from my farmer's market and make use of them.  First up - this lovely salad, which is elegant and delicious.  I chose to use watercress for the greens, but use whatever tender greens you like.  I love the slightly peppery bite and yet tender leaf of fresh watercress, and it went very well with the delicious dressing in this salad.

This recipe is another example of the sheer pointlessness of bottled salad dressing.  It's so easy to make your own, and it tastes so much better.  Give this one a try and see if you agree.  Traditionally the ratio of oil to acid is a bit higher, but in this case I chose to go with more acid and less oil.  The blood orange juice is so gorgeous, you don't want to overshadow it with oil.

Tender Greens and Vegetables with Blood Orange Vinaigrette
adapted from The Complete Italian Vegetarian Cookbook
serves 3

INGREDIENTS:


3 ounces green beans, trimmed and halved
4 cups mixed tender greens, washed and dried
1/2 bell pepper, seeded and thinly sliced
1/2 teaspoon grated zest and 2 tablespoons juice from 1 blood orange
1/2 tablespoon white balsamic vinegar
salt and freshly ground black pepper
1 1/2 tablespoons extra virgin olive oil

DIRECTIONS:

1.  Blanch the green beans briefly in salted boiling water, about 3 minutes.  Drain and shock in an icy water bath.  Drain again and dry.

2.  Put the beans, greens, and bell pepper in a large bowl.

3.  In a small bowl, whisk together the zest, orange juice, vinegar, salt and pepper to taste.  Stream in the oil slowly, whisking all the while.  Drizzle the dressing over the salad and toss to coat.  Serve immediately.

Enjoy!

Friday, January 22, 2010

Polenta with Garlicky Greens


If you showed this picture to the me of about ten years ago, before I could cook and before I appreciated both polenta and leafy greens, I would have shaken my head and said no thank you.  Now I see it and I almost drool.  This meal combines two of my favorite things, and I'm sharing it with you.  Don't you feel special?

My sister got me Jack Bishop's Complete Italian Vegetarian Cookbook for my birthday, and this is my inaugural recipe from it.  It's simple and delicious, just the way I like my food.  Jack's method of cooking polenta is slightly different from any way I've tried it before, and I'll admit I was suspicious of cooking it just in water (as opposed to broth and cream), but I have to say, this is the best polenta I've ever made.  I highly recommend that you try his method.

The greens are a combination of chard and spinach, quickly braised with a garlic and onion combo.  Everything comes together with a remarkably comforting balance of texture and flavor.  This is excellent food for a rainy winter night.

Polenta with Garlicky Greens
adapted from the Complete Italian Vegetarian Cookbook
serves 2

INGREDIENTS:

2 cups water
1/2 cup medium-grind cornmeal
salt
1 bunch Swiss chard, tough stems and ribs removed
2 cups fresh baby spinach
2 tablespoons extra virgin olive oil
1/2 medium onion, thinly sliced
2 garlic cloves, minced or pressed
freshly ground black pepper
1 tablespoon unsalted butter

DIRECTIONS:

1.  Start the polenta first, as it will take about 40 minutes.  Bring the water to a boil in a small saucepan over high heat.  Add a pinch of salt.  Reduce heat slightly and stream in the cornmeal slowly, whisking constantly.  Continue to whisk vigorously for about 30 seconds.  Reduce heat to a bare simmer and put the lid on.  Let cook for about 40 minutes, or until polenta is creamy and smooth, whisking every 10 minutes.

2.  While the polenta cooks, tear up the chard into chunks.  Make sure chard and spinach are thoroughly washed and drained, but don't dry it - you want some moisture still on the leaves. 

3.  Heat the oil in a large skillet over medium-high heat.  Add onion and saute until softened and nearly translucent, about 5 minutes.  Stir in the garlic and cook for about 30 seconds.  Reduce heat to medium and add the greens.  Stir carefully to coat them with the oil.  Season with salt and pepper, and put a lid on the pan.  Cook for 5 to 7 minutes, stirring occasionally, until greens are tender and wilted.  Remove lid and cook for an additional 2 minutes to let some of the liquid evaporate.

4.  When polenta is done cooking, stir in the butter.   Divide between two bowls and serve the greens over the top.

Enjoy!

Thursday, January 21, 2010

Pan-Seared Chicken with Orange & Grapefruit Sauce


Most people think of winter as a time of year when fresh produce is severely lacking.  We mustn't forget, children, the wonderful world of citrus.   Citrus is at its peak in the winter, and there is such a fantastic variety of options.  This recipe features two of the more common citrus fruits, available at any and every farmers market this time of year - orange and grapefruit.

This is a refreshing, elegant meal with a bevy of beautiful flavors.  It might help drag you out of the winter weather funk.  We're even dealing with that here in Los Angeles.  We need something bright and beautiful for dinner to make it all okay.

So grab an orange and a grapefruit and whip up this meal.  We had ours with steamed broccolini, but anything green will do nicely to round out the plate.

Pan-Seared Chicken with Orange & Grapefruit Sauce
adapted from Eating Well in Season
serves 2

INGREDIENTS:

1/2 small ruby red grapefruit
1 small navel orange
2 tablespoons flour
1/4 teaspoon salt
1/4 teaspoon freshly ground pepper
1/2 pound boneless skinless chicken breasts, trimmed
2 teaspoons canola oil, divided
1/2 small red onion, thinly sliced
2 tablespoons dry white wine
1 tablespoon orange marmalade
1 tablespoon chopped fresh mint or parsley

DIRECTIONS:

1.  Segment the grapefruit and orange over a bowl, using a sharp knife to remove the skin and pith, then cutting out each segment carefully, leaving membrane behind.  Let the bowl catch all the juices.  Squeeze out the membrane to get all the juice into the bowl.  Strain the fruit segments to separate them from the juice.  Reserve both and set aside.

2.  Combine flour, salt and pepper in a shallow dish.  Lightly dredge the chicken in the flour mixture.

3.  Heat 1 teaspoon oil in a medium nonstick skillet over medium-high heat.  Add chicken and cook until golden-brown and cooked through, about 3 to 4 minutes per side.  Remove chicken to a plate and cover to keep warm. 

4.  Add remaining teaspoon of oil to the pan.  Reduce heat slightly and add the onion.  Cook, stirring, until softened and slightly browned, about 3 minutes.  Add reserved fruit juices and wine and bring to a boil.  Boil until reduced by half, about 3 minutes.

5.  Reduce heat to low and add marmalade, reserved fruit segments, mint/parsley and pepper to taste.  Return chicken to pan and reheat gently.  Serve the chicken topped with the fruit, onion, and juice. 

Enjoy!

Wednesday, January 20, 2010

Cacio e Pepe with Spinach and White Beans


Cacio e pepe is a very simple, traditional Italian pasta dish.  The main ingredients (apart from the pasta) are cheese and black pepper.  But it's not completely smothered in those key ingredients - there is a delicate balance involved.   The traditional cheese of choice is pecorino romano, but I used parmesan and it came out pretty amazing. 

We all know you shouldn't make an entire meal out of pasta, butter, and cheese, though, right?  So along comes a simple and delicious side dish of wilted spinach and white beans.  This is simple home cooking at its best.  It's so easy and only takes about 15 minutes to make, but you feel remarkably satisfied afterward.  The definitive weeknight recipe.

Cacio e Pepe with Spinach and White Beans
adapted from Rachael Ray's Book of 10
serves 2

INGREDIENTS:

1/3 pound whole wheat linguine
1 1/2 tablespoons unsalted butter, cut into pieces
1 teaspoon plus 1 tablespoon extra virgin olive oil
1/2 teaspoon coarse black pepper, plus more to taste
salt to taste
1/2 cup finely grated parmesan cheese
3 cups tightly packed fresh baby spinach
2 garlic cloves, chopped
1 1/2 cups cannellini beans, rinsed and drained
pinch freshly grated nutmeg

DIRECTIONS:

1.  Bring a large pot of water to a boil and cook the pasta until al dente.  Save about 1/4 cup of the starchy cooking liquid before draining the pasta.  Drain.

2.  While pasta is cooking, heat the butter, one teaspoon of oil, and black pepper in a large skillet over low heat.  Let it hang out while the pasta is cooking.  When pasta is done, add the starchy cooking liquid to the butter mixture, followed by the cooked pasta.  Toss it all together with tongs.  Stir in the cheese until melted, and season to taste with salt and pepper.

3.  While steps one and two are underway, heat the remaining tablespoon of oil in a medium skillet over medium heat.  Add the garlic and cook for about 2 minutes, stirring occasionally.  Add beans and spinach, and stir gently until the spinach wilts and beans are cooked through.  Season with nutmeg and salt. 

4.  Serve the pasta with the spinach and white beans on the side. 

Enjoy!

Monday, January 18, 2010

Almond Flour Classic Drop Biscuits


These biscuits are fantastic.  I realize almond flour is not in everyone's refrigerator, but it is worth seeking out just so you can try these.  They are just the right proportion of salty and sweet - they are crunchy on top but incredibly tender inside.  They are, in short, the perfect biscuit.  Only they are much better for you than the average biscuit.

Yes, this recipe involves a couple of ingredients that are not exactly everyday.   But I find it fun to experiment with healthier variations on the norm - not for using all the time, but for occasions like this, when you just feel like a warm, flaky, drop-dead delicious biscuit.  If you don't want to invest in agave nectar, you can use honey or maple syrup, though of course they have less neutral flavors than agave does.  The almond flour is worth the price of admission, though.  It's a superfood, like I'm sure you keep hearing, so this is yet another yummy way to get almonds in your diet.

These biscuits are sitting on the fence between sweet and savory, so you could use them as part of a dessert (strawberry shortcake, perhaps) or alongside a warm and hearty dinner (maybe some rotisserie chicken and veggies - mmm, now I'm hungry.)

Almond Flour Classic Drop Biscuits
from The Gluten-Free Almond Flour Cookbook
makes 9

INGREDIENTS:

2 1/2 cups blanched almond flour
1/2 teaspoon sea salt
1/2 teaspoon baking soda
1/4 cup grapeseed oil (I used canola)
1/4 cup agave nectar
2 large eggs
1 teaspoon lemon juice

DIRECTIONS:

1.  Preheat oven to 350.  Line a cookie sheet with parchment or a silpat liner.

2.  Mix almond flour, salt, and baking soda in a large bowl.  In a medium bowl, whisk together oil, agave, eggs, and lemon.  Stir the wet ingredients into the dry until well combined.

3.  Drop biscuits on prepared baking sheet in scant 1/4 cups, 2 inches apart.  Bake for 15 to 20 minutes, until golden brown and a toothpick comes out clean when inserted in the middle of one.  Let cool a few minutes - serve warm.

Enjoy!

Vegetable-Lentil Soup


We're having some crazy rainy weather here in southern California right now, so it seems like the right time for a big pot of heart- and tummy-warming soup.  This one definitely fits the bill, and it is absolutely loaded with vitamins and nutrients, so hopefully it will fend off any colds that might try to follow the weather.

I've been trying to get behind lentils for a while now.  I didn't grow up with them, and my only real exposure to them has been through dal, which I like, but don't really eat on a regular basis.  I had a very traumatizing experience with lentil soup once before, so it took me a while to get back to trying it.  I'm glad I finally did, as this recipe comes together easily and features a rainbow of vegetables and flavors along with those little legumes. 

Vegetable-Lentil Soup
adapted from Williams-Sonoma's Eat Well
serves 4

INGREDIENTS:

1 tablespoon extra virgin olive oil
1 small yellow onion, diced
1 clove garlic, minced or pressed
1 small carrot, peeled and diced
1/2 red bell pepper, cored and diced
3 cups low sodium chicken broth
one 14.5 ounce can no salt added diced tomatoes
1 cup brown lentils, rinsed and drained
1/2 teaspoon paprika
1/2 teaspoon ground cumin
salt and freshly ground pepper
2 generous cups baby spinach, coarsely chopped
1 tablespoon dry sherry

DIRECTIONS:

1.  Heat oil in a large pot over medium-high heat.  Add onion and cook, stirring frequently, until softened, about 5 minutes.  Stir in garlic, carrot and bell pepper, and cook for about 3 more minutes.

2.  Stir in broth, tomatoes, lentils, paprika and cumin, along with a pinch each of salt and pepper.  Bring to a boil, reduce heat to simmer, cover, and cook for about 15 minutes, or until lentils are tender.

3.  Stir in spinach and cook, uncovered, just until spinach wilts, about 2 minutes.  Stir in sherry.  Serve hot.

Enjoy!

Saturday, January 16, 2010

Green Beans Marinara


Green bean season has begun early in this part of the world apparently, because I found beautiful green beans at the farmers market this morning.  I made this different sort of side dish with them, as we had an Italian themed potluck this afternoon.  A simple marinara sauce combined with fresh green beans - it's pretty hard to mess up, folks.  And it's yummy.

This would go well with a simple Italian chicken or pasta dish, or even just some crusty bread. 

Green Beans Marinara
adapted from Food Network Magazine
serves 6 as a side dish

INGREDIENTS:

1 1/4 pounds green beans, trimmed
extra virgin olive oil
1/4 teaspoon red pepper flakes
2 garlic cloves, crushed with the flat side of a knife
one 28 ounce can no salt added diced tomatoes
salt

DIRECTIONS:

1.  Bring a medium sized pot of water to a boil.  Cook green beans until just tender, about 5 minutes.  Drain.

2.  Meanwhile, coat the bottom of a large skillet with a thin film of olive oil.  Add red pepper flakes and garlic cloves and cook over medium heat, stirring occasionally, for about 2 minutes.  Drain some of the juices off the canned tomatoes, but not all, and add the tomatoes to the skillet.  Simmer for about 10 minutes.

3.  Add the drained green beans to the tomato sauce and simmer, covered, for 10 minutes.  Salt to taste. Remove the garlic cloves before serving.

Enjoy!

Thursday, January 14, 2010

Spinach, Caramelized Onion and Goat Cheese Pizza (CEIMB)


Today's pick for Craving Ellie in my Belly is this delicious and easy tortilla-based pizza.  The original recipe called for arugula, but I chose to use spinach, though either would be fantastic.  These are flavors that just naturally go together well, so it's pretty hard to go wrong.

This is like a more gourmet version of the kind of things I used to make when I was single and in law school, and often had to just grab whatever ingredients I had and throw together something a bit odd.  Sometimes it worked, sometimes it didn't.  This recipe most definitely works.  The perfect combination of creamy and crunchy, sweet and salty, angelic and naughty - once again, Ellie has it in the bag.

Tomorrow I promise to make something that is not an Ellie Krieger recipe....truly.

Spinach, Caramelized Onion and Goat Cheese Pizza
adapted from Ellie Krieger's The Food You Crave
serves 2

INGREDIENTS:

2 teaspoons olive oil
1/2 medium red onion, thinly sliced
3 cups baby spinach, caorsely chopped
salt and pepper to taste
two 6-inch diameter whole-wheat tortillas
1 ounce fresh goat cheese

DIRECTIONS:

1.  Preheat oven to 400.

2.  Heat oil in a large nonstick skillet over medium heat.  Add onion and cook, stirring frequently, until onions are golden-brown and softened, about 10 minutes.  Add spinach and cook, stirring, until just wilted, about 1 more minute.  Season to taste with salt and pepper.

3.  Lay the tortillas on a baking sheet and spread the spinach mixture over them.  Crumble goat cheese over the top.  Bake for 10 minutes, or until tortillas are crispy and browned around the edges, and cheese is getting melty.  Cool a few minutes before cutting into wedges.  Serve.

Enjoy!

Wednesday, January 13, 2010

Chicken Paillard with Watercress & Tomato Salad


This meal is extra special, not just because it is delicious and incredibly easy.  It's extra special because it was made by the lady herself, my culinary heroine, my favorite celebrity chef, the woman I admire and aspire to eat like and cook like - the one and only Ellie Krieger.

For my birthday, my sister got us tickets to go see Ellie Krieger do a culinary demonstration and book signing at a local cooking school in the LA area.  Right before our eyes, Ellie made breakfast, lunch, dinner, and dessert.  And we got to sample all of it.  She was so utterly charming and likeable, funny and charismatic - the superlatives know no bounds, folks.  It's so nice to admire someone on television and in books, and then to meet her in person and realize she's just as awesome as you imagined she would be.

And her food was delicious too.  Here I am featuring the lunch recipe she made, though of course it would do just fine for dinner.  It's fresh and tasty, and remarkably easy to pull together.  It also looks elegant and beautiful, much like Ms. Krieger herself.

So here is the recipe for you to make yourself.  Now I will go bask in the afterglow of having met one of my favorite people.

Chicken Paillard with Watercress & Tomato Salad
from Ellie Krieger's So Easy
serves 4


That's Ellie making me lunch.  Okay, so it wasn't just me.


INGREDIENTS:

1 1/4 pounds thin cut skinless boneless chicken breasts
3 tablespoons extra virgin olive oil
1 clove garlic, minced
3/4 teaspoon salt
3/4 teaspoon freshly ground pepper
3 tablespoons fresh lemon juice
1 large bunch watercress, tough stems removed, coarsely chopped
2 medium tomatoes, chopped
8 slices whole-grain baguette

DIRECTIONS:

1.  Combine chicken, 1 tablespoon of olive oil, the garlic, and 1/2 teaspoon each of salt and pepper in a bowl and toss to coat.  Preheat a grill or nonstick grill pan over medium-high heat.  Grill chicken until grill marks form and meat is just cooked through, 2 to 3 minutes per side.  Remove and drizzle with 1 tablespoon of lemon juice.

2.  In a large bowl, toss watercress and tomatoes, with their seeds, with remaining olive oil and lemon juice, and remaining salt and pepper.  Distribute chicken among 4 serving plates and top each with 1 1/2 cups of salad and 1 to 2 tablespoons of accumulated liquid from the salad.  Serve with baguette slices.

Enjoy!

Tuesday, January 12, 2010

Almond-Turmeric Potatoes


I will never look at a potato the same way again.  This is hands down the most delicious potato side-dish I've ever had, and it's really quite easy.  If you own a mandoline slicer, break it out for this dish, otherwise you'll really be testing your knife skills.  Otherwise, though, it pretty much brings itself together.

The potatoes are super-thin and melt in your mouth, the onions are sweet and caramelized to a blissful point, and the almonds provide a nice texture contrast.  The turmeric tints everything a beautiful golden hue.  The flavors are subtle and exotic at the same time.  It's magnificent.

These potatoes go well with anything from steak to seafood, so remember to try this one out the next time you need a supporting cast on your plate.  I, for one, am planning on eating turmeric potatoes for lunch tomorrow.

Almond-Turmeric Potatoes
adapted from The Splendid Table's How to Eat Supper
serves 3 as a side dish

INGREDIENTS:

good quality extra virgin olive oil
1/2 large yellow onion, thinly sliced
1/4 teaspoon ground turmeric
salt and freshly ground black pepper
3/4 pounds Yukon Gold potatoes, unpeeled, sliced as thin as possible
a splash of low sodium chicken or veggie broth (about a tablespoon or so)
handful of sliced almonds, toasted

DIRECTIONS:

1.  Generously film olive oil over the bottom of a medium saucepan with a tight-fitting lid.  Set the pan over medium-high heat.  Layer in the onion, turmeric, and some salt and pepper.  Top with the potatoes, and season with more salt and pepper.  Cook, without stirring, for about 6 minutes or so, until onion starts to soften and brown.  Don't stir, but peek under the potatoes to look for color.

2.  Add the broth and cover the pot.  Reduce heat to low.  Don't stir, but shake the pan occasionally.  Check to make sure there is still some liquid on the bottom of the pan periodically.   If needed, add some more broth.

3.  Cook for 15 minutes, or until there is a syrupy brown glaze on the bottom of the pan, the onion is coloring, and the potatoes are tender.  Remove the pan off the heat and let it stand, covered, for 5 minutes.

4.  Taste for seasoning - add more salt if needed.  Just before serving, sprinkle with the toasted nuts.  Scoop down from the bottom to get all the glaze and onion when serving up the potatoes.

Enjoy!

Thursday, January 7, 2010

Sweet and Spicy Peanut Soup (CEIMB)


This week's pick on Craving Ellie in My Belly is a very different sort of soup.  Ellie's name for it suggests it is primarily peanut flavored, but the main element is really sweet potato if you ask me.  This is a nice medley of rich and delicious flavors, featuring an unexpected peanutty creaminess. 

I made a change to the recipe and added some wine, but I actually wouldn't recommend it.  I felt like the wine distracted from the other flavors and didn't quite fit in.  Also, mine turned out quite thick because I used a large sweet potato (even though I cut Ellie's recipe in half), so pick the size of the sweet potato knowing it will directly influence the thickness of the soup. 

I wouldn't say this is one I'll make again and again, but it's different, interesting, and rather tasty.  If you're looking for a sweet potato soup to write home about, I'd suggest trying this one as well.

Sweet and Spicy Peanut Soup (CEIMB)
adapted from Ellie Krieger's The Food You Crave
serves 4

INGREDIENTS:

1/2 tablespoon canola oil
1/2 large onion, diced
1/2 medium red bell pepper, seeded and diced
1 carrot, peeled and diced
1/2 teaspoon cayenne pepper
pinch freshly ground black pepper
1 clove garlic, minced or pressed
1/2 teaspoon grated fresh ginger
1 sweet potato, peeled and cubed
3 cups low-sodium chicken or vegetable broth
1 cup no-salt-added canned diced tomatoes, with juices
1/3 cup creamy natural peanut butter
1 teaspoon honey
salt to taste
peanuts for garnish

DIRECTIONS:

1.  Heat oil in a soup pot over medium-high heat.  Add onion, bell pepper, and carrots, and cook, stirring, until veggies soften, about 5 minutes.  Stir in cayenne, black pepper, garlic, and ginger and cook for 1 more minute.

2.  Stir in sweet potato, broth and tomatoes and bring to a boil.  Reduce heat to medium-low and simmer, partially covered, until potatoes are tender, about 25-30 minutes.

3.  Turn off the heat.  Puree soup using an immersion blender (or in batches in a regular blender, then return to pot).  Stir in peanut butter and honey over low heat until the peanut butter melts.  Season to taste with salt.  Serve garnished with peanuts.

Enjoy!

Wednesday, January 6, 2010

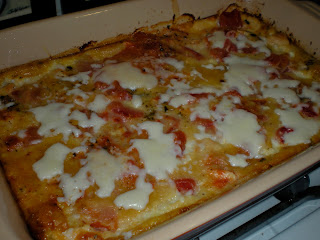
Italian Chicken Pie


Once in a while, we come upon a recipe that we want to mentally bookmark, dogear, put a gold star on, or somehow put a permanent reminder to come back to it.  Again, and again, and again.  This is one of those recipes.  It is easy, delicious, and would please just about anyone.  This is one that I want to remember to make for my kids some day.  It's going to be one of those go-to Friday night family dinner recipes. 

Okay, have I sold it enough?  My husband described this as a cross between chicken parmigiana and deep dish pizza.  Only guess what?  It's not nearly as unhealthy as either of those things.  It has all the yummy flavors you associate with Italian food - tomato, garlic, oregano, basil - plus cheese and chicken, and a tender crust.  Yum!

I reduced the recipe, as I often do, but if you double it for a larger group, make it in a 9-inch pie dish and get the whole pie experience. 

Italian Chicken Pie
adapted from The Best Casserole Cookbook Ever
serves 3-4

INGREDIENTS:

2 tablespoons grated parmesan cheese
1 cup diced cooked chicken breast
1/2 cup shredded mozzarella, divided
1/4 teaspoon dried oregano
1/4 teaspoon dried basil
1 clove garlic, minced or pressed
1 cup of canned diced tomatoes with their juice
1/4 cup whole wheat (or all-purpose) flour
1/2 teaspoon baking powder
1/2 teaspoon salt
2 tablespoons vegetable oil
1/2 cup nonfat milk
1 large egg

DIRECTIONS:

1.  Preheat oven to 400.  Coat a small baking dish (size isn't that important - go with a fairly shallow rectangular one if you have it, or divide among ramekins) with cooking spray.  Sprinkle the parmesan cheese in the bottom of the dish.

2.  Scatter chicken over the parmesan.  Top with 1/4 cup of the shredded mozzarella, the oregano, and basil.  Mix garlic with diced tomatoes and juice, and spread evenly over all. 

3.  Make the topping: in a small bowl, whisk together the flour, baking powder, and salt.  Add oil, milk, and egg, and continue whisking until the mixture is smooth like pancake batter.  Pour over the chicken mixture in the pan.

4.  Bake, uncovered, for 30-35 minutes, until set and golden brown.  Remove from oven and immediately sprinkle the top with the remaining 1/4 cup mozzarella.  Let sit 10 minutes before serving. 

Enjoy!

Tuesday, January 5, 2010

Orange and Black Currant Scones


My mother and I started a tradition on the first anniversary of my grandmother's passing.  We decided that everyone in our family, wherever we may be, should have a cup of tea on behalf of Nanny (that's what we call her) every year on January 5.   She loved her nice cups of tea, often to the tune of about four cups a day.  Some of us take the tradition a little farther and go for afternoon tea, which she also loved - my husband and I have been known to race to a local English tea room after we got off work on a January 5, when they were due to close in about 10 minutes.

This year I decided to make scones to have with some tea at home.  I took a recipe for scones and made it even more English, if that's possible, by adding black currants.  Black currants are a severely underrated fruit in the United States.  I don't know why little kids in the U.S. aren't plied with them from an early age.  In England they flavor all sorts of candies, jams, drinks, desserts, and other baked goods.  Black currant has been one of my favorite flavors for as long as I can remember.  And as an added bonus, they are loaded with Vitamin C and antioxidants.

In these scones I used dried black currant berries.  These are not to be confused with plain old Zante currants, which are small hard little black things, more like mini raisins.  These are juicy little berries with a rich sweet-tart flavor.  If you have a hard time finding them, you could substitute raisins, dried or fresh blueberries, dried cranberries, or whatever you like.  If you can find them, though, I highly recommend the black currants.  They set these scones over the edge, and even the orange zest alone gets these scones pretty close to that edge.  I'm pretty sure Nanny would have loved them.

Orange and Black Currant Scones
adapted from Gourmet Today
makes 8

INGREDIENTS:

2 cups whole wheat pastry flour (all-purpose is okay)
2 tablespoons plus 1 teaspoon sugar
2 1/2 teaspoons baking powder
1/4 teaspoon salt
1 stick (8 tablespoons) cold unsalted butter, cut into tablespoons
1 cup dried black currant berries
1/2 cup skim milk
1/4 cup heavy cream
1 large egg, separated
1 tablespoon finely grated orange zest
1/2 teaspoon vanilla extract

DIRECTIONS:

1.  Put a rack in the middle of the oven and preheat oven to 375.

2.  In food processor, pulse together flour, 2 tablespoons sugar, baking powder, and salt.  Add butter and pulse until mixture resembles coarse pebbly sand.  Transfer to a large bowl and stir in currants.

3.  Stir together milk, cream, yolk, zest, and vanilla in a small bowl.  Add to flour mixture, stirring just until a cohesive dough starts to form.  Do not overmix.

4.  Turn dough out onto a lightly floured surface and gently knead until it just comes together.  It will be sticky, so prepare to get your hands dirty.  Transfer to an ungreased baking sheet and pat gently into a 7 inch round.

5.  Lightly beat egg white and brush onto the top of the scones.  Sprinkle with remaining teaspoon of sugar.  Cut into eighths, but do not separate.  Bake for 30-35 minutes, or until golden brown all over.  Let cool 15 minutes before separating.  Serve warm.

Enjoy.  Love, Sparkle

Monday, January 4, 2010

Roasted Winter Vegetables over Polenta


I realize my blog is starting to look like the What-to-Serve-Over-Polenta blog.  I can't help it.  Polenta is just that good.  It's kind of like pasta - a great bed to host any delectable topping you choose to accompany it. 

I am cheating a little bit in calling these "winter" vegetables, since green beans are not really a winter vegetable.  But I wanted something green to provide some color contrast, and they are delicious little beasts.  Halved brussels sprouts would be magical in this dish.  The original recipe called for cauliflower, but I'm still having trouble getting out of the "meh" camp when it comes to cauliflower.  Forgive me. 

You can cook the polenta whatever way you like - the stovetop method is probably best here, since you have to roast the vegetables at such a high temperature that the polenta would cook too fast if you had it in the oven, too.   But experiment and see what you like. 

Here it is, then, another lovely and simple meal with lovely, versatile polenta as the base.

Roasted Winter Vegetables over Polenta
adapted from Eating Well in Season
serves 3

INGREDIENTS:

2 cups cubed butternut squash
2 cups halved brussels sprouts, or green beans
1 leek, white and light green parts, chopped
1 tablespoon extra virgin olive oil
pinch of salt and freshly ground pepper
pinch of garlic powder
1 1/2 cups low sodium vegetable broth
1/4 cup cream or milk
1/2 cup polenta, or coarsely ground cornmeal
1/2 teaspoon chopped fresh rosemary
1/4 cup finely grated parmesan cheese

DIRECTIONS:

1.  Preheat oven to 475.  Toss the veggies with oil, salt, pepper, and garlic powder in a bowl.  Lay out on a rimmed baking sheet.  Bake for 25 to 30 minutes, stirring halfway through, until tender and brown in spots.

2.  Meanwhile, combine broth and cream in a small saucepan.  Bring to a boil, whisk in polenta, rosemary, and a bit of freshly ground pepper.  Reduce heat to low, cover and cook, stirring occasionally, until thick and creamy, 10 to 15 minutes.  Stir in cheese; remove from heat. 

3.  Serve vegetables over polenta.

Enjoy!

Sunday, January 3, 2010

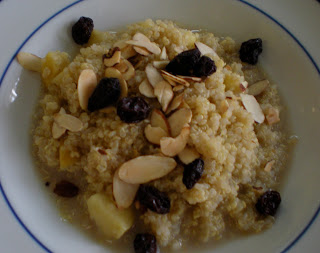
Honey Harvest Quinoa


I think everyone knows, whether they like to admit it or not, that breakfast is truly the most important meal of the day.  I am not a licensed nutritionist, but believe me, I've read enough about food and health for all of us.  Save yourself the trouble and take my word for it - if you're trying to eat better, to lose weight, to prolong your life, to boost your immunity, any and all of the above - eat a nutritious breakfast.

Here is a great recipe for you to try this out.  It's different from the same-old cereal or oatmeal (not that there's anything wrong with cereal or oatmeal).  It takes a lovely little under-appreciated seed called quinoa and turns it into a slightly sweet, protein-packed hot cereal.  Yum!

You can play with this as much as you like - maple syrup instead of honey would be great.  Pecans or walnuts or any other nuts instead of the almonds would be great.  The original recipe used dried cranberries, but I had some gorgeous raisins on hand so I used those instead.  The quinoa is your oyster.  Or something like that.  As it is, though, the recipe is nutty and just sweet enough to be a very enjoyable breakfast indeed.

Honey Harvest Quinoa
adapted from Ellie Krieger's So Easy
serves 2

INGREDIENTS:

3/4 cups quinoa, rinsed in a fine mesh strainer
1 1/4 cups water
1 small Gala apple, cored and cut into small chunks
1/4 cup skim milk
1 tablespoon honey, plus more for serving
1/4 teaspoon ground cinnamon
2 teaspoons unsalted butter (optional)
2 tablespoons raisins
1/4 cup slivered almonds, toasted

DIRECTIONS:

1.  Put the quinoa and water in a small pot over high heat and bring to a boil.  Reduce to simmer and cover.  Cook for 5 minutes.

2.  Add apple chunks and continue to cook, covered over low heat, until water is absorbed, about 10 minutes more.

3.  When the quinoa is cooked, stir in the milk, honey and cinnamon, and cook until milk is heated through, about 1 more minute.  Spoon into serving bowls and top with a bit of butter if using, along with the raisins and nuts.  Serve hot.

Enjoy!

Friday, January 1, 2010

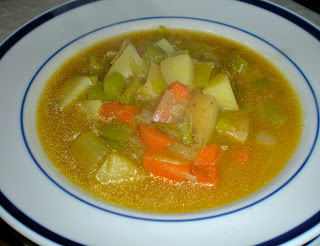
Leek and Potato Soup


I'm back!! And just in time for the new year. 

We had a lovely vacation earlier this week, which is why I haven't been posting at all.  I do have to say that I missed cooking, mostly because I missed eating home-cooked food.  Having three meals out at restaurants in a day is not such a treat as it may seem.  I don't know how people who don't cook can take it. 

The bad news is that we both caught colds on our vacation, so our happy new year meal, and my re-entry to the land of cooking, is a simple and healthy soup.  You can practically feel the vitamins seeping into you with each bite.  And of course, it's delicious. 

This is a very simple version of potato-leek soup; not as fancy as the version I posted about here, but tasty in its own right.  It's I-want-to-be-done-good-to soup.  And it gets the job done.

Leek and Potato Soup
adapted from Jamie Oliver (Jamie's Food Revolution)
serves 4

INGREDIENTS:

3 cups low sodium vegetable broth
2 leeks, white and light green parts only, cleaned and chopped
1 tablespoon extra virgin olive oil
1 large carrot, chopped
1 large celery stalk, leafy tops included, chopped
1 garlic clove, minced or pressed
3/4 pound baby Yukon gold potatoes, cubed
freshly ground black pepper and sea salt to taste

DIRECTIONS:

1.  Bring the broth to a boil in a medium saucepan.  Reduce heat to low and keep warm.

2.  In a medium Dutch oven or heavy soup pot, heat the oil over medium-high heat.  Add leeks, carrot, celery, and garlic.  Cover the pot partially and cook for about 15 minutes, stirring occasionally, until veggies are tender.

3.  Add the broth and potato and bring to a boil.  Reduce heat to simmer and cover partially.  Let simmer for 10 minutes, or until potatoes are tender.  Serve the soup chunky, or puree if you like.

Enjoy!